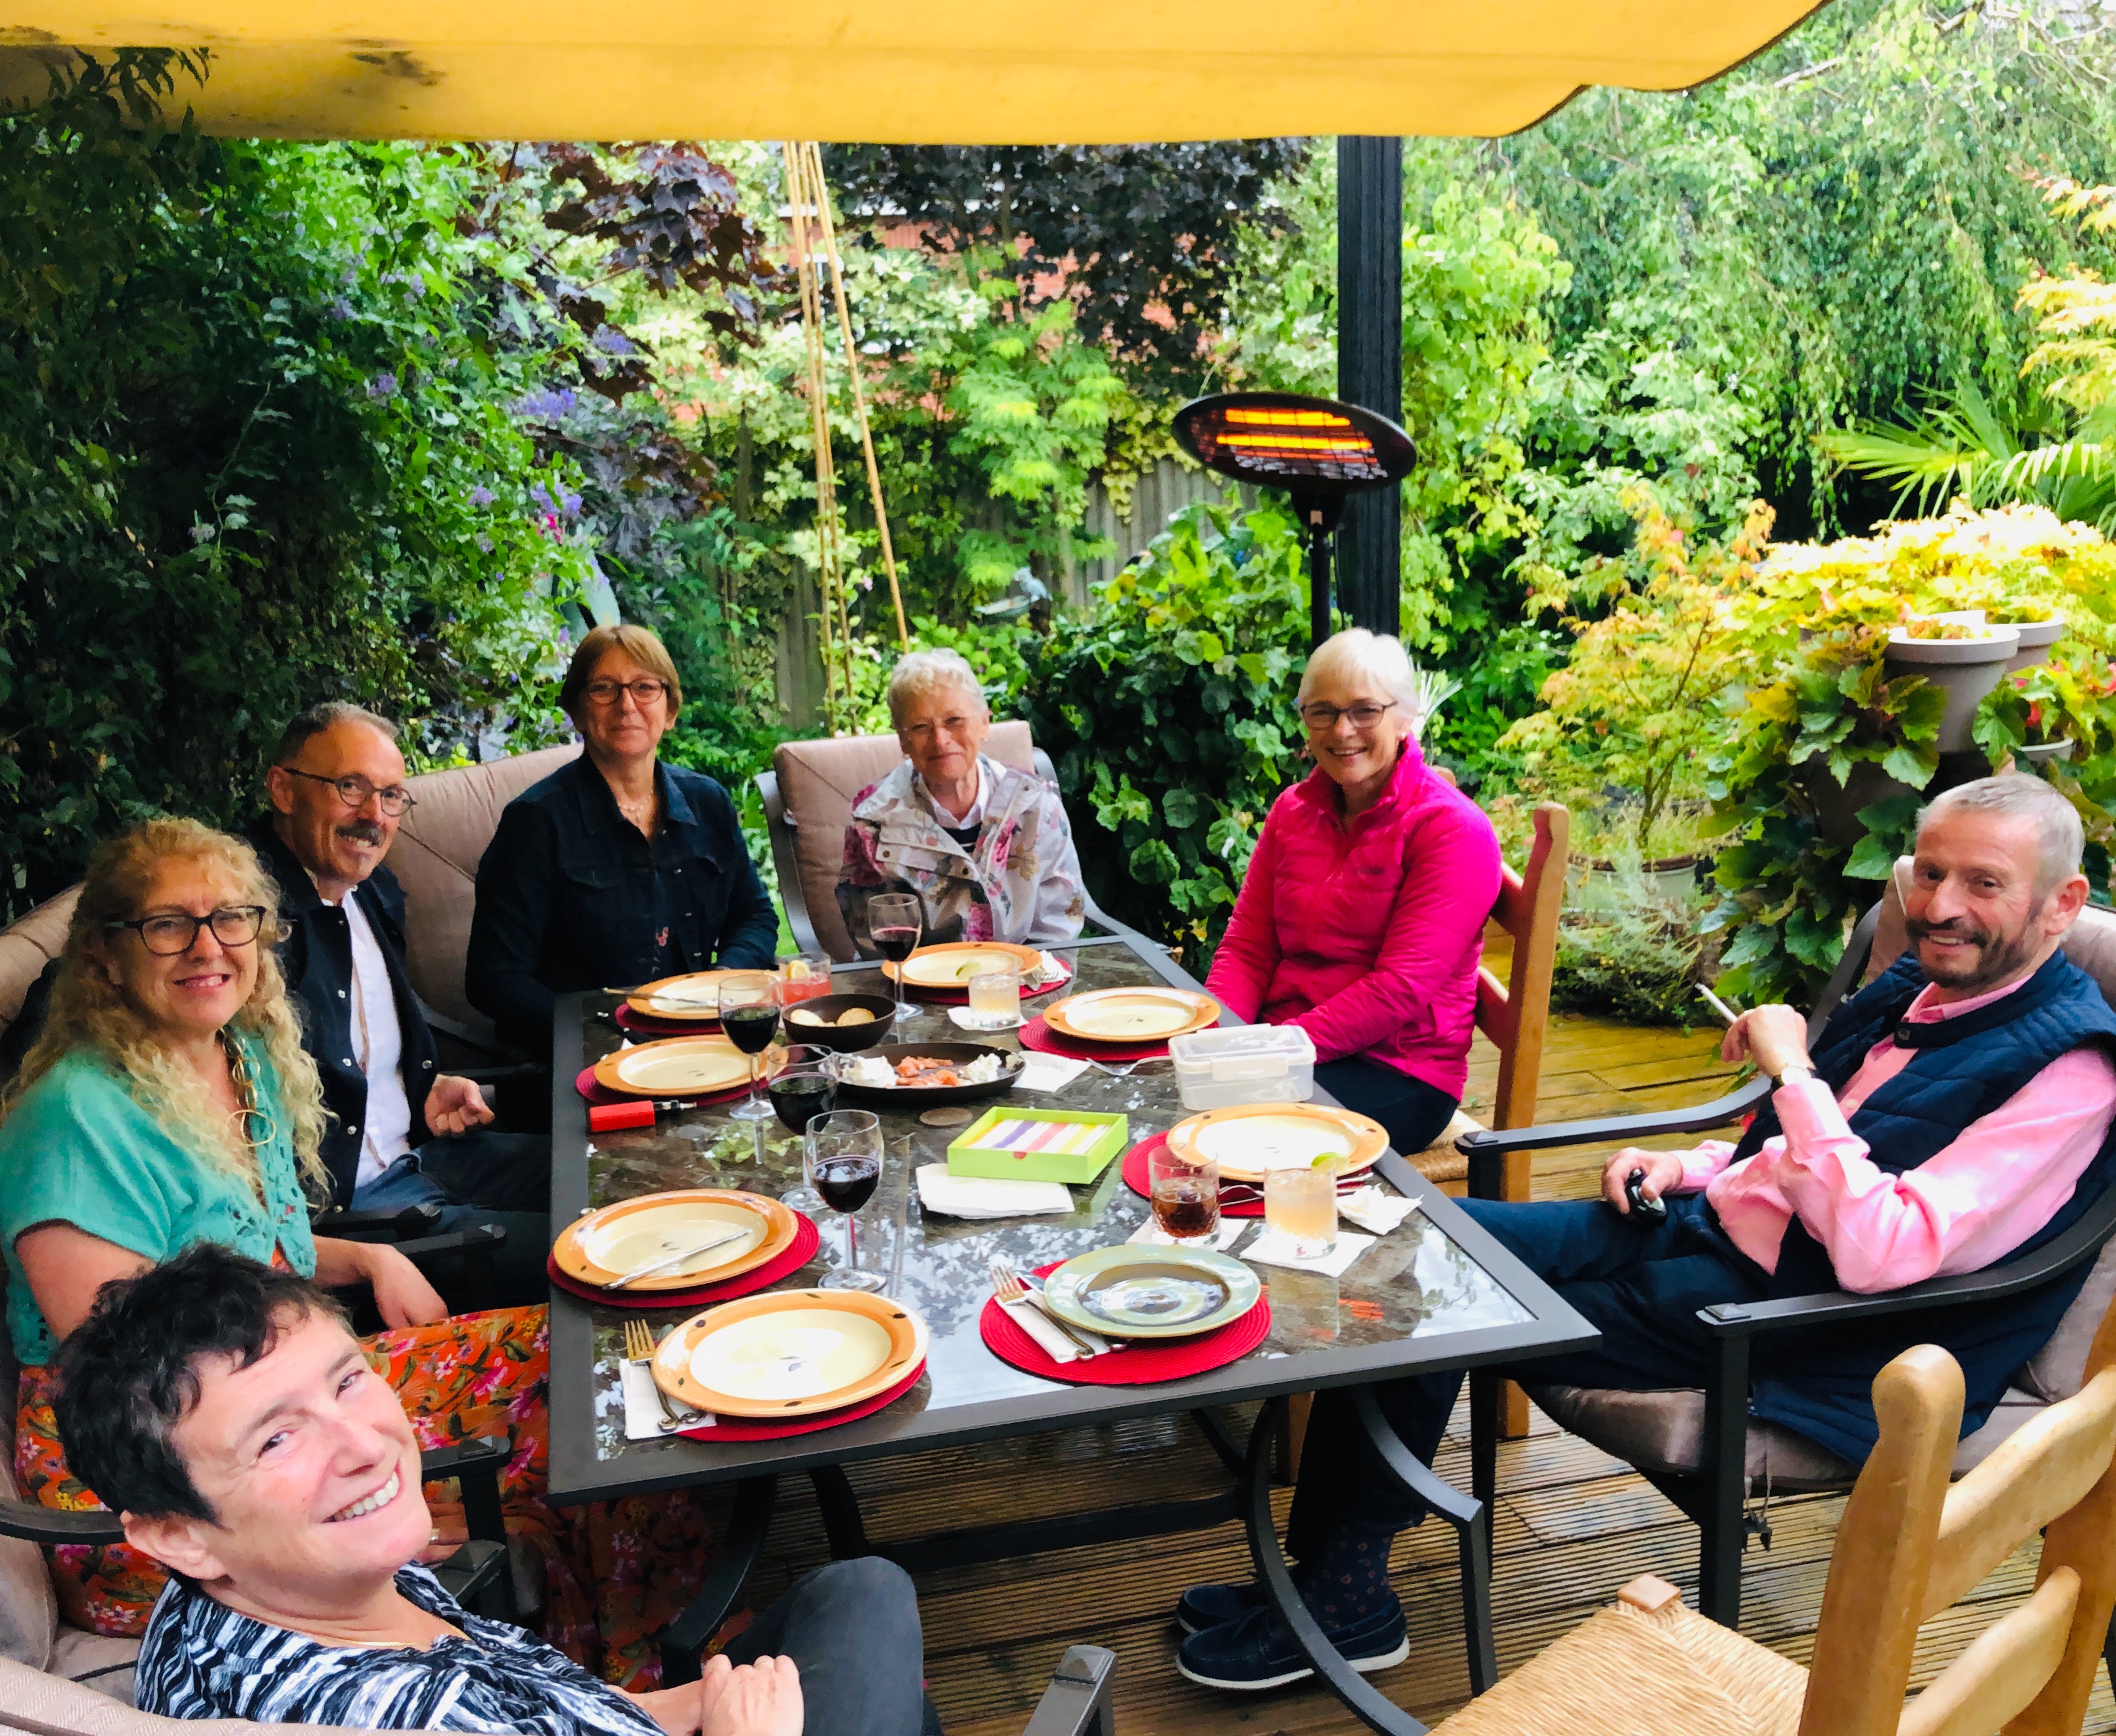
We were very lucky to be invited to house sit in Oundle, England. Not only were we staying in a lovely home in a neat little village, but the place was tricked out with everything one can imagine, including cable TV (in English), Wi-Fi and a BBQ grill. It also came with a great dog named Georgie and a classy white cat named Alfie. The two guys who owned the house (Lance and Adrian) have a gang of friends who immediately took us into their fold and made us feel right at home. It only made sense for us to have the gang over to the house for dinner and drinks.
We decided to offer our new English friends some good Southern hospitality in the form of slow smoked pork BBQ. For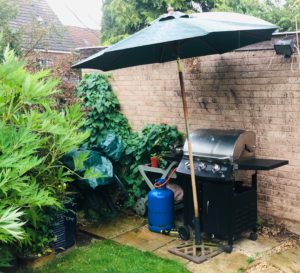 those of you who have not yet created this delicacy, the rest of this article is dedicated to a detailed explanation of how George does it. Note that before we sold everything and headed out to wander the world, George had a large pellet smoker and could smoke 50 pounds (22.7 kilos) of pork at a time. In England, we had fewer people to feed and a regular gas grill, some adjustments had to be made.
The first task is to figure out how much pork you need. In general, you should plan for a half to a third pound of cooked meat (150 – 200 grams) per person. Remember that the meat loses about 40% weight during the cooking process. In our case we were planning on feeding 7 people, but we also wanted some left over to freeze and share with our hosts when they returned home, so we were looking for a 5-7 pound butt. Once you know the size, then you need to find a piece of pork that is worthy of the time and effort that it takes to make this dish. After several stops, we found a local butcher in the village that said they could fix us up with a seven-pound (3.2 kilo) pork shoulder. It is worth noting that in the Southern part of America, we call this cut a pork butt, not at all sure why, as it does come from the shoulder area. The nice folks at Trendalls Butcher Shop in Oundle got us all fixed up.
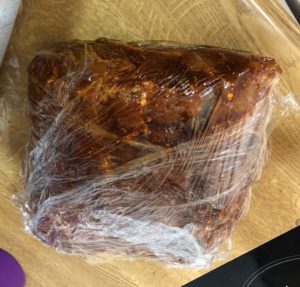
In most cases the butcher will cut the outer skin off the pork butt for you, if they do, ask 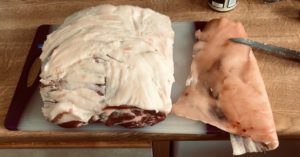 them to leave as much of the layer of fat (called a fat cap) between the skin and the meat as possible. The fat cap will help add moisture to the meat as it cooks down during the smoking process. Because we will be cooking this meat for many hours at a low temperature (low and slow) it is important to keep it from becoming dry. The fat cap will help, but there are also other steps we can take. This first is a process called brining, in essence, we will be soaking the meat in salt water. The salt helps the liquid be absorbed by the meat and it also helps add flavor
 (double bonus). In a large container, mix about 2 cups of kosher salt and a cup of sugar into a gallon of water. Stir until all the solids are dissolved. Place the pork into a large plastic bag, pour the salt water over it, then work all of the air out of the bag and seal it shut with a strong twist tie. If you have enough room in the refrigerator you can put it there. I did not, so I put the whole thing in a small cooler with bag of ice to keep it cold. Brine the pork for between 24 and 30 hours.
At some point while the pork is brining, you can mix up the rub you will be putting on the meat. There are a lot of different pre-mixed pork rubs on the market, but it is cheaper and better to make your own. Use the list of ingredients below to mix up enough rub for 1 pork butt, double if you are smoking two. Store it in a Ziplock bag, and save any leftover for the next time you cook any kind of pork.
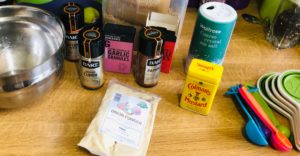 George’s Butt Rub
- 1/2 cup light brown sugar
- 1/4 cup sweet paprika (not smoked or hot)
- 2 tbsp salt
- 1 tbsp chili powder
- 1 tbsp onion powder
- 1 tbsp garlic powder
- 1 tbsp pepper
- 1 tbsp mustard powder
- 2 tsp cumin
- 1 tsp cayenne pepper
There are two other steps that can be taken care of in advance, one is to soak wood chips in a bowl of water overnight. We find that apple wood tends to taste the best when smoking pork. The second is to set up your grill. Regardless of whether you are using gas or charcoal, the objective is to keep the heat source on one side of the grill and he meat on the other (indirect heat). If possible, remove half of the grill rack on the heat side and leave the other half on the side where the meat will be. This will make it easy to place and refill a chip box and water pan. Place a metal pan on the grill floor below where the pork will be and fill it with water. This will not only help keep the inside of the smoker moist, but it will also catch a lot of the messy fat dripping from the pork, making clean up much easier later.
Once the meat is brined for 24 to 30 hours, take it out of the salt water, rinse it with cool clean water to remove excess salt and pat it dry. Next sprinkle the spice mixture (the butt rub) liberally over the pork and rub it in well. If you have time, it is best to do this in advance, then wrap the meat in cling film and let it refrigerate for 2 or more hours.
 On the morning of the day you will be smoking the meat (remember this
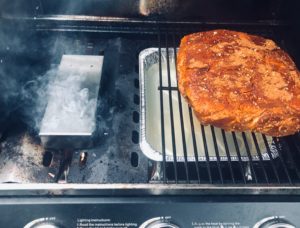
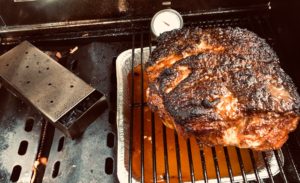
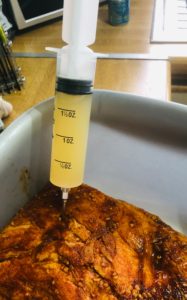 process can take up to 9 hours), fill the metal pan in the grill with water. Place a generous hand full of the soaked apple chips in the chip tray and either light the charcoal in a chimney or light one burner on the grill. In the photo below, you can see that we placed to the chip tray to the far left and we only used a single burner on the far-left side of the grill (indirect heat). Warm the grill so that the temperature of a gauge where the meat will be placed reads 220 degrees F (104 degrees C). Don’t trust the thermometer built into the top of the grill, it does not give you and accurate reading of what is happening at where the meat is. We recommend using an oven thermometer.
 While the grill is heating, make a mixture of half (50%) apple juice and half apple cider vinegar. You will need about 4 cups (1 liter) of this mixture to complete the day. Unwrap the pork butt and place it fat side up in a large pan. Using a large syringe, inject about 1.5 to 2 cups (about ½ liter) of the mixture into the pork butt. Out at the grill, take the pork out of the pan, and place it (still fat side up) on the grates away from the heat source.
Set a timer for 3 hours, find a good book: George re-read an old Travis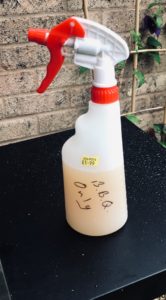 McGee book (by John D. McDonald) and relax for a bit. For the first hour and a half just make sure your temperature stays around 220 F. If needed, add more wood chips to keep the smoke going. After 1.5 hours, mist the meat with a spray bottle full of your apple juice/cider mixture. Do this on the half hour until you have been smoking for 3 hours total. At the three hour mark, wrap the pork butt loosely in heavy duty aluminum foil, add half a cup of the apple juice/cider mixture and seal the foil tightly, this will allow the pork to “steam” inside the foil. For the next two hours the butt should be kept at a steady 225 degrees F, this can either be on the grill or inside in the oven. In BBQ cooking competitions, this step is known as “the cheat” or “the crutch”, it really helps keep the meat moist.
 After two hours, unwrap the meat and put it back onto the rack on the grill. Continue to cook at 225 F and spray with your cider/vinegar mix every the half hour. After two hours, start checking the internal temperature of the meat when you spray. You are looking for an internal temperature of 169 F (76 degrees C) in all areas of the butt. Don’t worry if some areas get warmer, you will not overcook the meat. This final part of the cooking can take anywhere from 2 to 4 hours. Be patient, and do not be tempted to take the pork out before it reaches temp. If you do, it will make it nearly impossible to shred in the next step.
When you finally reach the desired temperature, remove the pork from the grill, place it on a pan and cover it with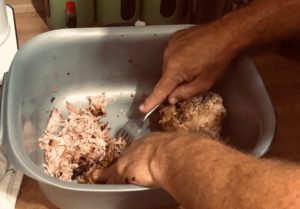 aluminum foil. Allow it to rest and cool for at least one hour (preferable two) before removing the bone and shredding the meat. The shredding (or pulling at it is called) is easiest with a pair of forks. If you are planning on smoking a lot of pork, you may want to invest in a set of “bear claws” to make the process of shredding faster and easier.
Once the meat is completely shredded, mix in a liberal amount of your favorite barbecue sauce (George likes Sweet Baby Ray’s)
Pro tip: most commercial BBQ sauce is way too thick to use and much too sweet.
Mix it down half and half with water for a better consistency and taste.
We have found that the pork tastes better if you refrigerate it overnight after it is shredded and mixed with sauce. Just pop it back in the oven for an hour at 250 F to reheat.
Last step: make up some side dishes, invite some friends over, pour a cold beer and bask in the glory of the compliments over your amazing pulled pork BBQ!

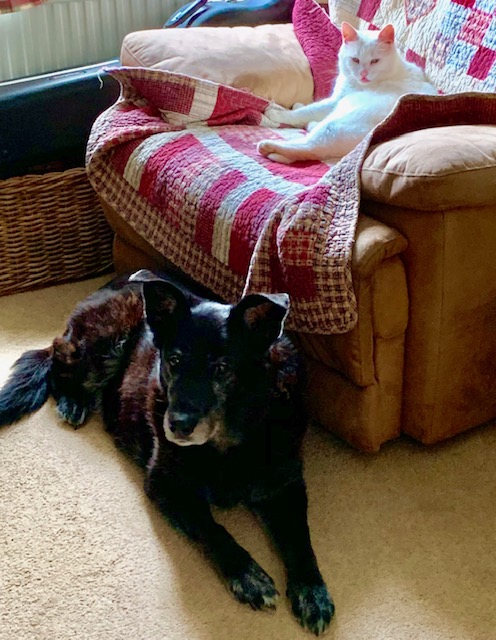
 been for the invitation from Lance and Adrian (Ady) to come look after their home and pets while they visited family in Canada. Lance is a landscape designer, so you can imagine how amazing the gardens around the house were. Adrian is a retired flight attendant with lots of great stories about his travels. They have a dog named Georgie and a cat named Alfie who are both amazing and full of personality.
 group of friends who pal around, share dinners, support each other in ride sharing and projects and just enjoy each other’s company in general. While we were no substitute for Lance and Ady, we certainly had fun hanging out with their friends.
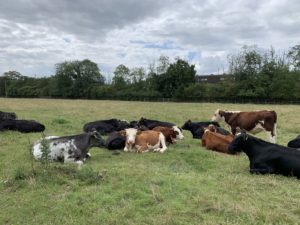 Many of these are created in cooperation with local farmers. This allows you to take long walks through fields and along the river. You can never tell if you will be in the
  middle of a heard of cows (or sheep) or walking down a country road.